
Installare Immich Su Synology NAS
Immich can easily be installed on a Synology NAS using Container Manager within DSM. If you have not installed Container Manager already, you can install it in the Packages Center. Refer to the Container Manager docs for more information on using Container Manager.
Step 1 - Download the required files
Create a directory of your choice (e.g. ./immich-app) to house Immich. In general, it's best practice to have all Docker-based applications running under the ./docker directory, so in this case, your directory structure will look like ./docker/immich-app.
Now create a ./postgres and ./library directory as sub-directories of the ./docker/immich-app.
When you're all done, you should have the following:
- ./docker/immich-app/postgres
- ./docker/immich-app/library
Download docker-compose.yml and example.env to your computer. Upload the files to the ./docker/immich-app directory, and rename example.env to .env. Note: If you plan to use the Synology Text editor to edit the .env file on the NAS within File Station, you will need to rename it to a temporary name (e.g. example.txt) in order to see 'Open with Text Editor' in the file context menu. Once saved, rename it back to .env.
Step 2 - Populate the .env file with custom values
Download these files:
- https://github.com/immich-app/immich/releases/latest/download/docker-compose.yml
- https://github.com/immich-app/immich/releases/latest/download/example.env
and put them in ./docker/immich-app directory.
Edit the .env file with your data o customizations:
 # You can find documentation for all the supported env variables at https://docs.immich.app/install/environment-variables

 # The location where your uploaded files are stored
 UPLOAD_LOCATION=./library

 # The location where your database files are stored. Network shares are not supported for the database
 DB_DATA_LOCATION=./postgres

 # To set a timezone, uncomment the next line and change Etc/UTC to a TZ identifier from this list: https://en.wikipedia.org/wiki/List_of_tz_database_time_zones#List
 # TZ=Etc/UTC

 # The Immich version to use. You can pin this to a specific version like "v2.1.0"
 IMMICH_VERSION=v3

 # Connection secret for postgres. You should change it to a random password
 # Please use only the characters `A-Za-z0-9`, without special characters or spaces
 DB_PASSWORD=postgres

 # The values below this line do not need to be changed
 ###################################################################################
 DB_USERNAME=postgres
 DB_DATABASE_NAME=immich
- Populate UPLOAD_LOCATION with your preferred location for storing backup assets. It should be a new directory on the server with enough free space.
- Consider changing DB_PASSWORD to a custom value. Postgres is not publicly exposed, so this password is only used for local authentication. To avoid issues with Docker parsing this value, it is best to use only the characters A-Za-z0-9. pwgen is a handy utility for this.
- Set your timezone by uncommenting the TZ= line.
- Populate custom database information if necessary.
Step 3 - Create a new project in Container Manager
Open Container Manager, and select the "Project" action on the left navigation bar and then click "Create".

In the settings of your new project, set "Project name" to a name you'll remember, such as immich-app. When setting the "Path", select the ./docker/immich-app directory you created earlier. Doing so will prompt a message to use the existing docker-compose.yml already present in the directory for your project. Click "OK" to continue.

The following screen will give you the option to further customize your docker-compose.yml file. Take note of DB_STORAGE_TYPE: 'HDD' and uncomment if applicable for your Synology setup.

Skip the section asking to set-up a portal for Web Station, and then complete the wizard which will build and start the containers for your project.
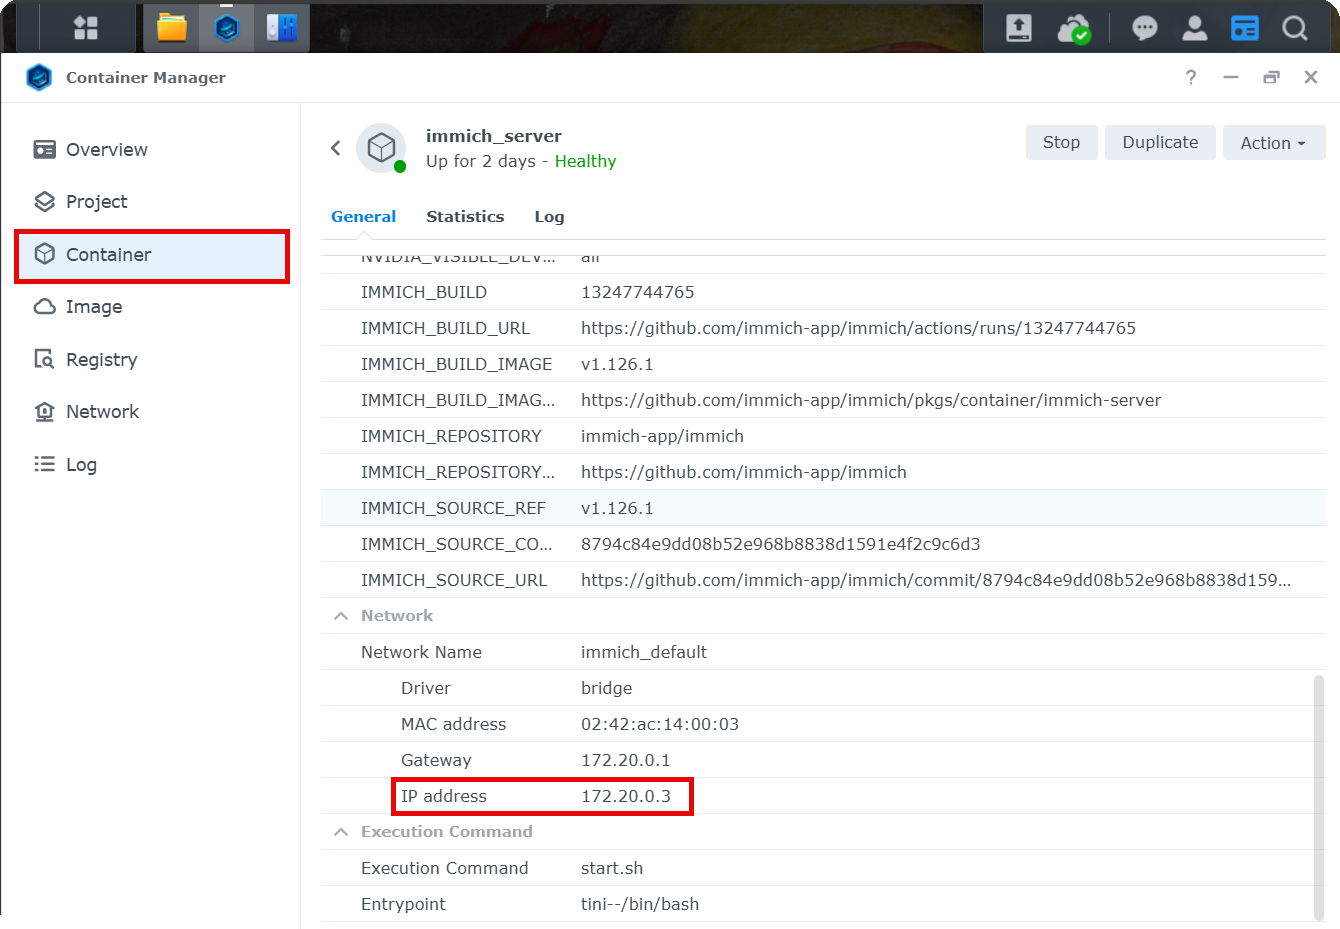
Once your containers are successfully running, navigate to the "Container" section of Container Manager, right-click on the "immich-server" container, and choose the "Details".
Scroll to the bottom of the "Details" section and find the IP Address listed in the Network section. Take note of the container's IP address as you will need it for Step 4.
Step 4 - Configure Firewall Settings
Once your project completes the build process, your containers will start. In order to be able to access Immich from your browser, you need to configure the firewall settings for your Synology NAS to allow communication between the Immich containers.
Open "Control Panel" on your Synology NAS, and select "Security". Navigate to "Firewall"
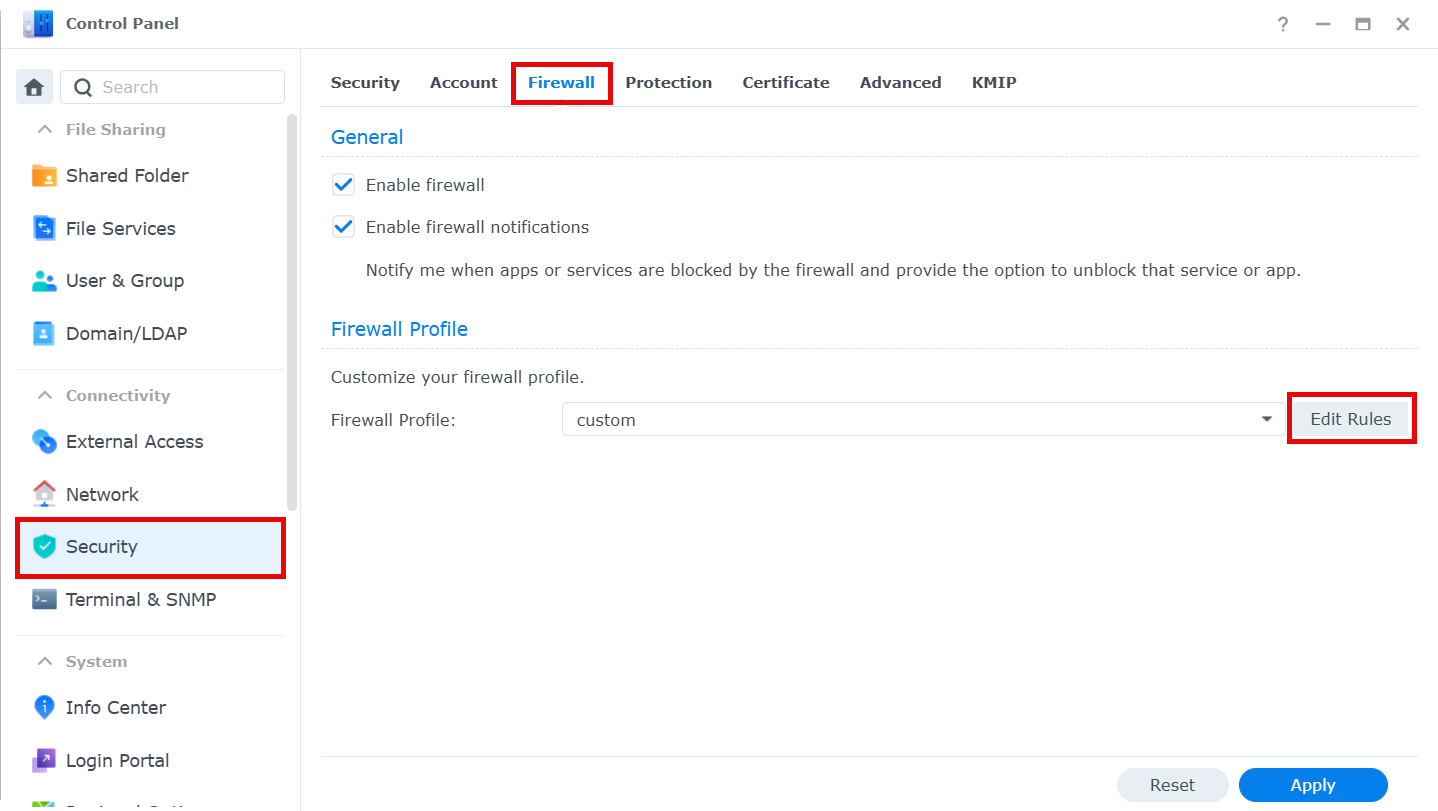
Click "Edit Rules" and add the following firewall rules:
- Add a "Source IP" rule for the IP address of your container that you obtained in Step 3 above

- Add a "Ports" rule for the port specified in the docker-compose.yml, which should be 2283
Post installation steps
Go to http://<machine-ip-address>:2283 and click on the Getting Started button.